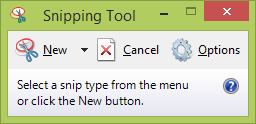
Why Snipping Tool is better than Print Screen
 “Sometimes the easiest way to make a copy of something is to take a snapshot of your screen—this is what Snipping Tool does. Use it to save and share news stories, movie reviews, or recipes,” says Microsoft in its How-To article on the Snipping Tool – a well-hidden tool that has been around for many years.
You can capture part or all of your PC screen, add notes, save the snip, or email it right from the Snipping Tool window. Below is an introduction to the use of this helpful little tool. I saved a shortcut on my task bar for ease of access.
Links for Microsoft’s articles on Snipping Tool are Windows 8.1, Windows RT 8.1 and Windows 7 Home Premium, Professional, Ultimate, and Enterprise editions. Both are very instructive. Below is a simplified and shortened version.
Why Snipping Tool is better than Print Screen
- More control over what is NOT selected as well as what is. Print Screen simply takes it all.
- Free form allows you to snip odd shapes – with your finger on touch screen or mouse on regular
- Full screen snip is still available.
- Simply copy and paste into your email or document – no need to save the snip
- Add notes or draw arrows on the snip prior to saving/copying.
- Easy capture of a menu for procedural documents – Ctrl+PrintScreen
- Easy to use SendSnip button allows to share your snip.
To Find Snipping Tool
- In Windows 8, open Snipping Tool by swiping in from the right edge of the screen, tapping Search (or if you’re using a mouse, pointing to the lower-right corner of the screen, moving the mouse pointer up, and then clicking Search), entering Snipping Tool in the search box, and then tapping or clicking Snipping Tool.
- In Windows 7, open Snipping Tool by clicking the Start button Picture of the Start button. In the search box, type Snipping Tool, and then, in the list of results, click Snipping Tool. You can also make a desktop shortcut from the search result.
- Snips can be annotated, stored as an image file (PNG, GIF, or JPEG file) or an MHTML file, or e-mailed. Snipping Tool allows for basic image editing of the snapshot, with different colored pens, an eraser, and a highlighter. Wikipedia has a helpful article.
Capture a snip
In Snipping Tool, tap or click the arrow next to the New button, choose the kind of snip you want, and then pick the area of your screen that you want to capture. The snip is automatically copied to the Snipping Tool window.
Tip
You can add notes to a snip by writing or drawing on or around the snip. There are highlighting tools and drawing tools for making notes.
Save a snip
- 1.After you capture a snip, tap or click the Save Snip button.
- 2.In the Save As dialog box, enter a file name, location, and file type, and then tap or click Save.
Remove the URL
When you capture a snip from a browser window and save it as an HTML file, the URL appears below the snip. To prevent the URL from showing up:
- 1.Tap or click Tools, and then tap or click Options.
- 2.In the Snipping Tools Options dialog box, clear the Include URL below snips (HTML only) check box, and then tap or click OK.
Share a snip
After you capture a snip, tap or click the arrow next to the Send Snip button, and then choose whether you’d like to send the snip in the body of your email or as an attachment.
Snipping Tool is intuitive. It’s one of those software tools that grow on you – the more you use the more you learn the easier it become the more you depend the more you use! Very helpful tool for a variety of applications.

